Percona Everest IdP integration
Identity Provider (IdP) integration connects applications and services with an external identity provider for your organization. This enables centralized authentication and authorization management, improving security and simplifying user access. By leveraging IdP integration, you can ensure that users are securely authenticated and authorized to access various applications and services across your organization.
Percona Everest uses OpenID Connect (OIDC) Protocol to integrate with external Identity Providers (IdP).
Note
To integrate IdP with Percona Everest, first, install Percona Everest and then configure OIDC on the IdP’s side as well as the Percona Everest side.
Configure OIDC on the providers’s side
-
Proof Key for Code Exchange (PKCE): When setting up the Provider side, it’s important to configure an application specifically for PKCE authorization.
-
Redirect URIs:
- Sign-in redirect URIs should point to
<EVEREST_URL>/login-callback. -
Sign-out redirect URIs should point to
<EVEREST_URL>.Important
IdP providers often require a secure connection (HTTPS). Therefore, the provider might require your
<EVEREST_URL>to be based on HTTPS. If your provider requires this, consider adding a reverse proxy in front of Percona Everest to provide such functionality.
- Sign-in redirect URIs should point to
Example: OIDC configuration on the providers’s side
Below is an example of the configuration for the IdP provider Okta.
Other popular IdPs include Microsoft Azure Active Directory, Auth0, Google Identity Platform, etc.
OKTA
-
Sign in to your Okta organization as a user with administrative privileges.
-
In the Admin Console, go to Applications → Applications and click Create App Integration.
-
On the Create a new app integration page, set the following:
- Sign-in method - OIDC - OpenID Connect
- Application type - Signle-Page Application, and click Next.
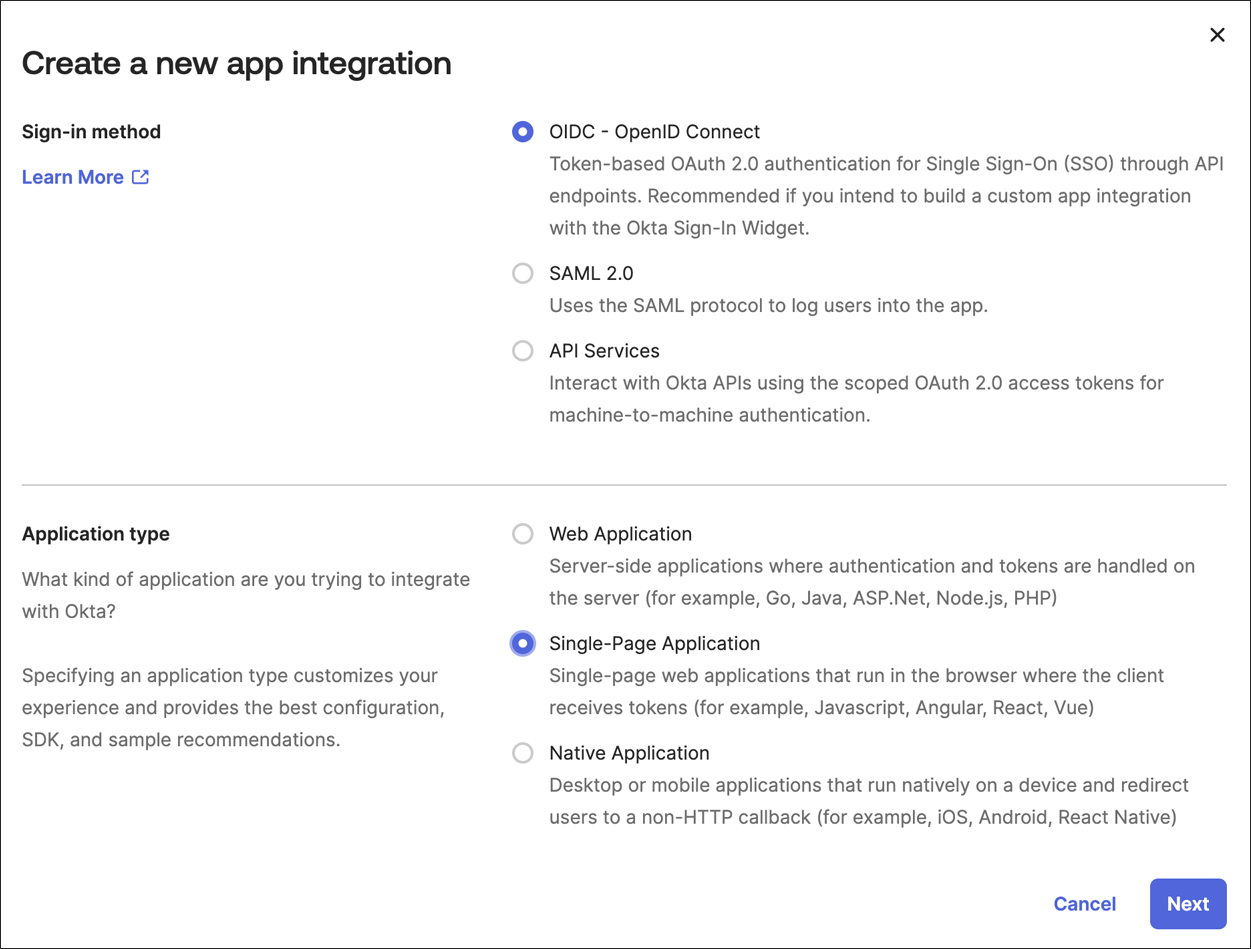
-
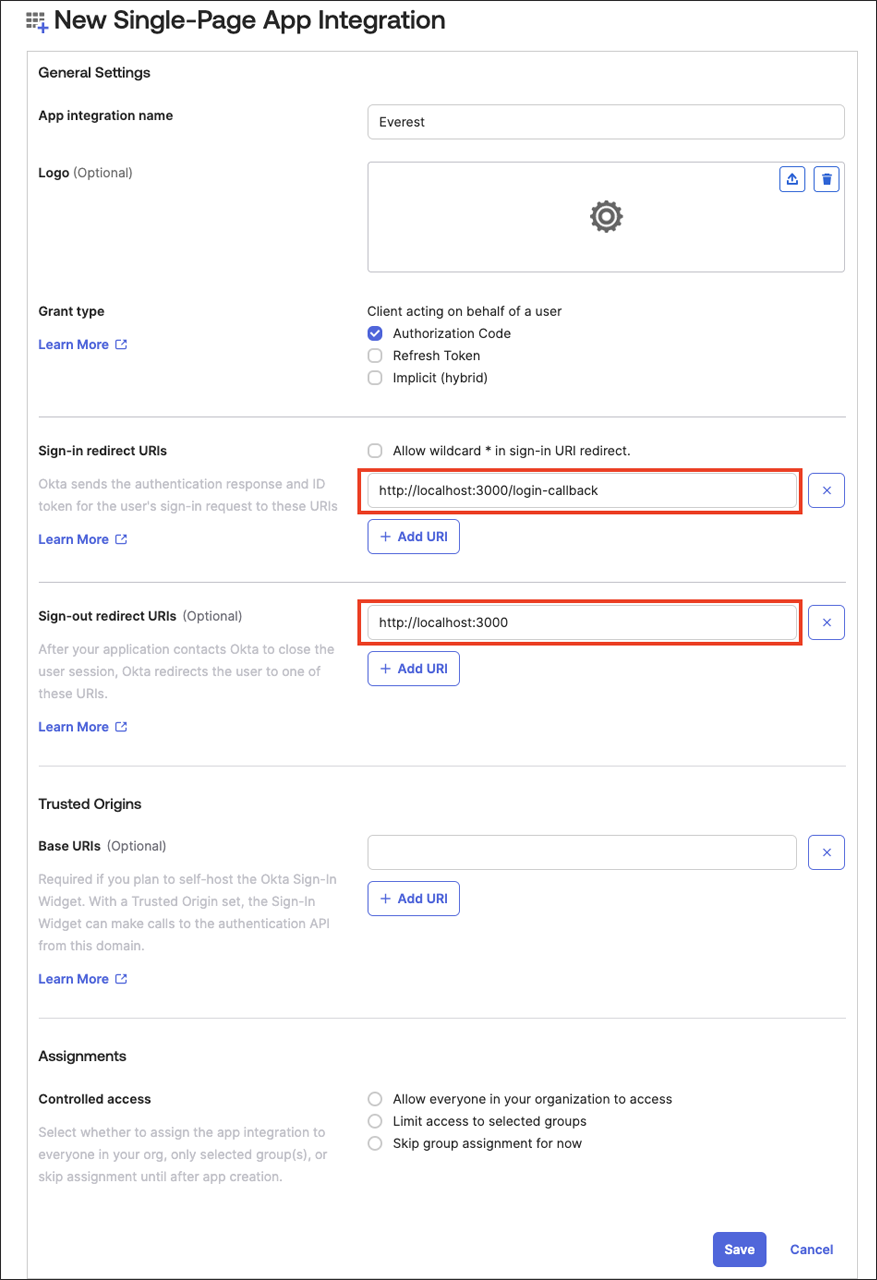
Set the following fields:
a. App integration name - any value
b. Sign-in redirect URIs -
<EVEREST_URL>/login-callbackc. Sign-out redirect URIs -
<EVEREST_URL>d. Click Save.
e. Copy the
clientIDof the created app.f. Navigate to Security → API → Authorization Servers and copy the
issuerURLyou’d like to use for the Everest authorization.Note
Okta allows the use of HTTP for development purposes and in cases where the Admin explicitly permits it.
Configure OIDC on the Percona Everest’s side
You can configure OIDC on the Percona Everest’s side using the CLI in headless mode or with the wizard.
Note
You must have obtained the Issuer URL and Client ID values from the Configure OIDC on the providers’s side section.
To configure OIDC using the headless mode, run the following command:
everestctl settings oidc configure --issuer-url=http://url.com --client-id=<your-app-client-id
Output
2024-06-18T11:06:18Z    info    oidc/configure.go:110   OIDC provider configured, restarting Everest..
2024-06-18T11:06:33Z    info    oidc/configure.go:117   OIDC has been configured successfully
To configure OIDC using the wizard, run the following command:
$ everestctl settings oidc configure
Output
? Enter issuer URL <your-provider-url>
? Enter client ID <your-app-client-id>
2024-06-18T11:05:15Z    info    oidc/configure.go:110   OIDC provider   configured, restarting Everest..
2024-06-18T11:05:30Z    info    oidc/configure.go:117   OIDC has been configured successfully
What’s happening under the hood?
This command stores the updated configuration in k8s and restarts the Everest deployment.
-
Store Configuration
The OIDC settings are stored in the
everest-settingsConfigMap in theeverest-systemnamespace, along with other settings, in the following format:apiVersion: v1 kind: ConfigMap metadata: name: everest-settings namespace: everest-system data: data: oidc.config: | issuerUrl: <your OIDC provider URL> clientId: <your OIDC provider client ID>The Everest user should not directly interact with the
everest-settingsConfigMap. Use the CLI command to set up the OIDC config. -
Restart Percona Everest
OIDC configuration must be in place for Percona Everest to start the API Server, allowing the server to utilize the OIDC provider’s validation. This means that after setting up the OIDC configuration, the Percona Everest API Server needs to be restarted.
The CLI command typically takes approximately 15 seconds to execute. It waits for the Everest Deployment to be up again before exiting successfully.
Important
-
The restart only impacts the Everest UI and API. Database clusters are not affected.
-
The restart results in the loss of the port-forwarding connection. If you had port-forwarding enabled on your machine to access Percona Everest UI and API, you will need to set it up again.
-
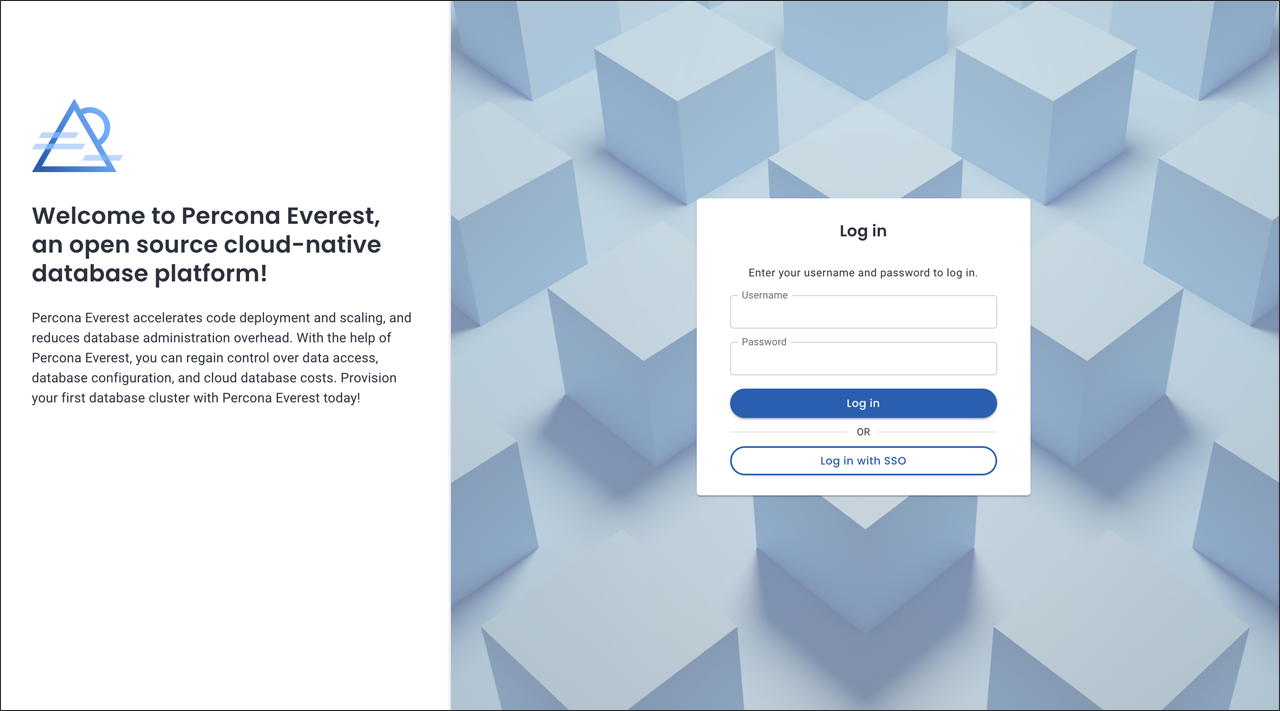
Testing IdP integration
After setting up your OIDC configuration, you can verify the functionality by visiting the Percona Everest login page and attempting to log in using Single Sign-On (SSO).
Get expert help
If you need assistance, visit the community forum for comprehensive and free database knowledge, or contact our Percona Database Experts for professional support and services.